8 NotebookLM Productivity Tips for Learning and Research
These NotebookLM productivity tips help you turn a collection of sources into something you can use: a clearer presentation, an explanation you understand, or a set of questions worth reviewing. Start with one task, choose relevant material, then use the result to do some work of your own.
The examples below use long-form YouTube videos, including Patrick Winston's How to Speak, Karpathy's Micrograd lecture and 3Blue1Brown's Vectors. The same approach works with project documents and research notes. NotebookLM is now called Gemini Notebook; the instructions here refer to that product.
Start with the How to Speak video and notes
NotebookLM productivity tips at a glance
Choose the part of your workflow that needs attention. You can use each tip independently, or follow them in order with one video and your own notes.
1. Give each notebook one job
Name the outcome before adding sources. “Improve the opening of Friday's technical presentation” gives you a more useful direction than “Learn about public speaking.” For a study session, pick one concept you want to explain or one problem you want to solve.
Keep sources for that task together. A notebook for a presentation might contain the relevant lecture, your outline and a few notes about the audience. A notebook for backpropagation needs different material. This makes it easier to decide what belongs in the current question.
Tell the chat what you already know and what you need next. You can use the Learning Guide chat setting when you want educational explanations, then ask for a specific output rather than an open-ended summary.
2. Select sources for the question you are answering
Before asking a question, select the sources it should use. A single lecture is a useful starting point; add another source when it answers a question the first cannot resolve. There is no target number of sources to reach.
If you are still choosing a technical video, read the prerequisites and learning routes in the Karpathy guide or 3Blue1Brown guide. HN discussion can help you understand why people recommended a video, but keep those opinions distinct from the lecturer's explanation.
Give sources recognizable names. “Original lecture — How to Speak” and “My presentation outline” make it easier to ask which source supports a suggestion. Check a source's date when the task depends on current facts.
3. Ask for a useful output and its evidence
Choose the format you need before writing your prompt. A comparison table helps distinguish related concepts. A short checklist helps you revise something. A list of unanswered questions helps plan your next reading session.
For Micrograd, ask how a forward pass, backpropagation and a parameter update differ. Then check the cited passages against the lecture. A polished answer can still leave out a condition that matters in the code.
Using the selected micrograd lecture, explain the difference between a forward pass, backpropagation and a parameter update. Give one short example for each and cite the supporting source passages. If the transcript does not show a code or visual detail, flag it so I can check the original video.Treat this as a starting prompt. If the answer is too broad, narrow it to the operation or example you are working through. Follow a citation before carrying a claim into your own notes.
4. Add structured notes alongside the original source
A transcript and a companion note serve different purposes. The transcript records the spoken explanation; notes can organize concepts, add practice examples and record questions you want to follow up.
You can add a public YouTube URL with captions and upload a Markdown file as a separate source. For a prepared TalkShelf video, open Downloads and save the editable notes file, notes.md. Upload that file manually in NotebookLM and give it a name such as “TalkShelf companion notes — How to Speak.”
Keep the original YouTube URL too. Adding a TalkShelf webpage URL does not automatically import the interactive study tabs. Ask the tool to distinguish the original explanation from examples added in the notes:
Compare the selected lecture transcript with the TalkShelf companion notes. Separate points supported by the lecture from additional explanations or practice examples introduced in the notes. Cite the relevant source for each point and list anything I should check.Review the imported source before relying on it. If you revise a downloaded file later, update your notebook copy as well; the file and the website do not stay synchronized.
5. Match the output to the task
Use an Audio Overview when you want an introduction or recap you can listen to. Give it a focus, such as the opening and closing of a presentation, rather than asking it to cover every source equally. A short written outline may be easier to inspect when you need to compare claims.
For code and visual mathematics, return to the original material. A YouTube source imports the transcript, so an explanation of a moving vector or a line of code may need the actual picture. With Vectors, draw the arrow and its components, then replay the relevant section to check your drawing.
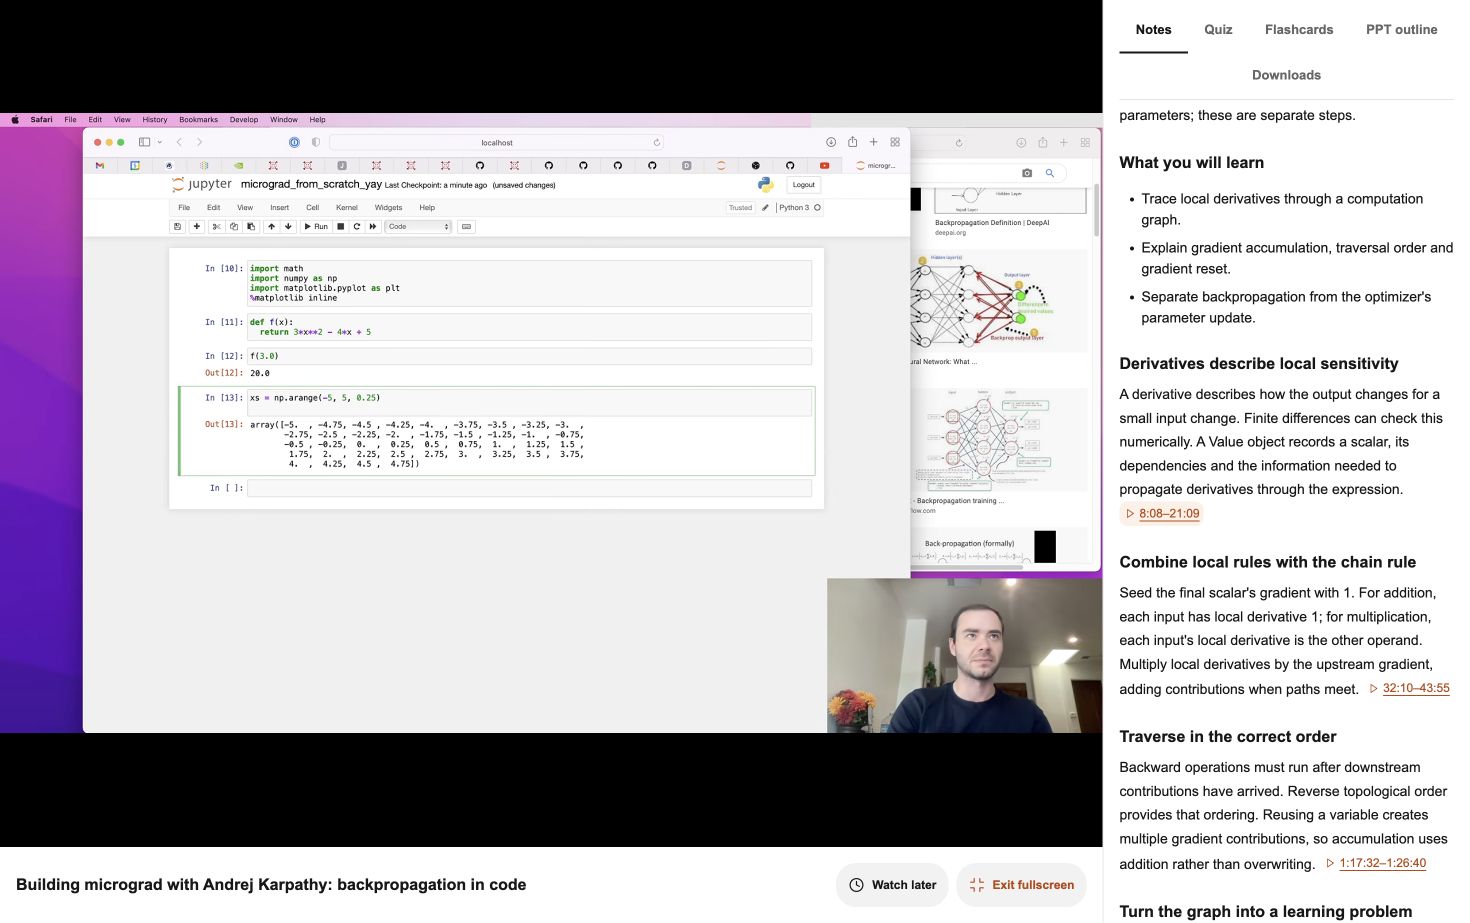
On TalkShelf, Fullscreen study keeps the video and prepared materials together on desktop. Select a time range in the notes to revisit that explanation. On a phone, the materials sit below the video. The video study guide explains these controls.
6. Test yourself before asking for another summary
After reading an explanation, close it and try to answer a question. For Micrograd, explain why gradients need to accumulate when a value is used more than once. For How to Speak, write an opening that tells your audience what they will gain.
NotebookLM can generate quizzes from selected sources. Customize the focus and difficulty for the question you are studying. Answer before asking for an explanation, and keep a short list of concepts you still cannot explain.
You can also use TalkShelf's prepared Micrograd quiz. It has eight questions, explanations and source timestamps. After checking your answers, use Review missed and return to the relevant video section.
The two tools keep separate results. Use whichever fits your session, and check your reasoning rather than treating a score as proof that you can apply the idea.
7. Keep a small set of flashcards and review it
Choose ideas you want to remember after the session. A useful question asks for one distinction or explanation: “How does backpropagation differ from a parameter update?” is easier to review than “Explain neural networks.” Edit a vague card before adding more.
NotebookLM has flashcards, review controls and CSV downloads. If you use TalkShelf's prepared cards, you can edit their wording, reveal an answer and record whether you remembered it. A successful first review schedules the next for the following day, then a later review around day seven; Again restarts the sequence with a ten-minute interval.
TalkShelf keeps that progress in the current browser. Export edited cards as CSV if you want to take your changes elsewhere. For Anki, check the Front, Back and Tags fields before importing. NotebookLM-generated cards do not automatically appear in TalkShelf.
8. Turn what you learned into something you can use
End with a small piece of work: a revised opening, a one-page explanation, a solved example or a presentation outline. This gives the session a destination and exposes questions a summary alone may hide.
For a technical presentation, add your own draft and ask for source-based feedback. Keep suggested revisions separate from advice actually present in the lecture. Supply missing context about the audience yourself.
Review my presentation outline using only the selected How to Speak source. Separate source-based guidance from your suggested revisions. Focus on the opening promise, the structure and the closing. Identify unclear wording and ask me for missing context instead of inventing it.NotebookLM also offers reports and Slide Decks when those formats suit the task. TalkShelf's prepared PPT material is an eight-slide text outline with talking points, which you can consult while making your own presentation. Rehearse the result aloud and decide what still needs work.
NotebookLM productivity workflow: prepare a presentation opening
Use How to Speak for a concrete first session. You need a Google account to use NotebookLM, the public video, and an opening or outline you wrote yourself. You can add the companion notes when you want a second, organized source.
- Write a two-sentence opening for a presentation you actually need to give. Keep this version so you can compare your revision.
- Add the original How to Speak YouTube URL to a notebook. If useful, download
notes.mdfrom the video page and upload it separately. - Add your draft. Use the presentation prompt above and inspect the supporting source passages.
- Return to the lecture to check the relevant advice. Use the notes' time ranges to revisit it, then revise your opening.
- Rehearse the new version. Ask a listener what they expect to learn from your opening, and change any wording that left them unsure.
For a coding session, replace the presentation draft with a small computation graph from Micrograd. For a visual session, use Vectors and draw an example yourself. Keep one clear outcome in each case.
NotebookLM and TalkShelf: choose the right tool for each task
| Your next task | A useful starting point |
|---|---|
| Ask questions about documents or videos you have collected | NotebookLM, with the relevant sources selected |
| Choose a video and check its prerequisites | TalkShelf's topic and channel guides |
| Try an existing video's notes, quiz and timestamped review | A prepared TalkShelf video |
| Ask follow-up questions about companion notes | Download the notes, then upload them to NotebookLM |
Common questions
Can NotebookLM work with YouTube videos?
Yes, it supports public YouTube videos with captions. It imports the text transcript as a source. If a video fails to import, check its availability and captions; use the original video for details shown on screen.
Can I upload TalkShelf notes to NotebookLM?
Download the editable Markdown notes from a video with prepared materials, then upload the file as a source. Google lists Markdown among its supported formats. Keep the source credit and name the notes separately from the original lecture.
Should I use Audio Overviews, quizzes or flashcards?
Choose an overview for orientation, a quiz to check your understanding and flashcards for ideas you want to revisit. You can combine them, but generate an output because it serves your task rather than because the option is available.
Do I need to pay to try this workflow?
Use the features available in your NotebookLM account; limits depend on the account and plan. TalkShelf's prepared launch materials are currently free without sign-in. Videos labeled as in preparation do not yet have a downloadable pack.
Start with one source and one question
Choose one of these NotebookLM productivity tips for your next session. Set a small task, check the source behind the answer and make something you can explain or use afterwards.
Choose a video with ready-made study materials